JotForm is a good online survey service to use if you:
- Would like to collect an Opt-In signature for GDPR compliance,
- Would like to automatically integrate your collected data with a CRM such as SalesForce, and/or
- Appreciate 24/7 customer support availability.
Note that there is a small fee to use this service if you expect to collect more than 100 survey responses in a month. The fees range from $19-$99 for a month, and the subscription can be cancelled anytime. A $39 fee allows for 10,000 responses. See JotForm’s GDPR compliancy as a third party .
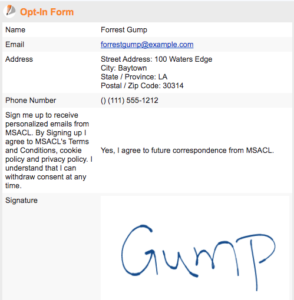
Example Opt-in document created by launching a JotForm from BadgerScan where contact information is automatically entered:
Instructions to create Signature Opt-in form:
- From a computer (mobile devices may not have required options), create or log into your account at jotform.com.
- Select the My Forms menu option then select Create Form.
- Select Blank Form, create a title and the form building interface will be displayed.
- Decide if you want a single page form or multi page with each question on a single page. You will most likely want a single page, especially if you will be creating an Opt-In form. By creating a single page form, you still have the option to break up questions over multiple pages, such as one page for a new contact to fill in, and another page with internal questions for a company representative to complete. To ensure the form is set to the single page mode, select the Settings tab from the orange menu bar at the top of the page, then Show More Options, then choose All Questions in One Page under Form Layout.
- Begin adding your desired Form Elements to you survey under the Build tab. You will find several e-signature widgets available under the Widgets tab.
- Include contact information such as Name, Email, and Address which will be automatically filled in by BadgerScan. This is the complete list of Contact Data Keys that may be sent from BadgerScan to your survey form to pre-populate the form fields when the survey is launched:
View the Contact Data Keys
- When you have completed adding all of your desired form questions, move to the Settings tab. Decide if you would like to send emails of form submissions, and if you would like to include any 3rd party integrations such as SalesForce, DropBox and Google Drive. Any form submissions would be automatically and immediately sent to these 3rd parties.
- Next is a slightly tricky step, and the step that is vital for ensuring the data scanned from badges is automatically collected in your form. You need to use a JotForm Plugin App to enable Field Pre-population.
- Click on the JotForm logo at the top left of the page to return to the home page and main menu.
- Select Plugins then Apps from the menu.
- In the Search box search for Field Prepopulator.
- Click on the Field Prepopulator app and select Add to Form.
- You will see a Form Picker with a list of all the forms that you have created. Select the form you would like to Pre-populate and press Continue.
- Now you will enter the Contact Data Keys exactly as listed into the corresponding form fields. Any field entries that EXACTLY match a Contact Data Key will be replaced with actual attendee data by BadgerScan when the form is launched. JotForm will provide a warning for if the data provided does not math what is expected, but it will not prevent you from continuing, so you can ignore warnings here.
- When you have completed filling in data keys, select Generate URL.
- Copy the Full URL, and email it to any devices that will be used for collecting leads with BadgerScan. DO NOT use the Shortened URL as it will not allow BadgerScan to replace data keys with actual attendee data.
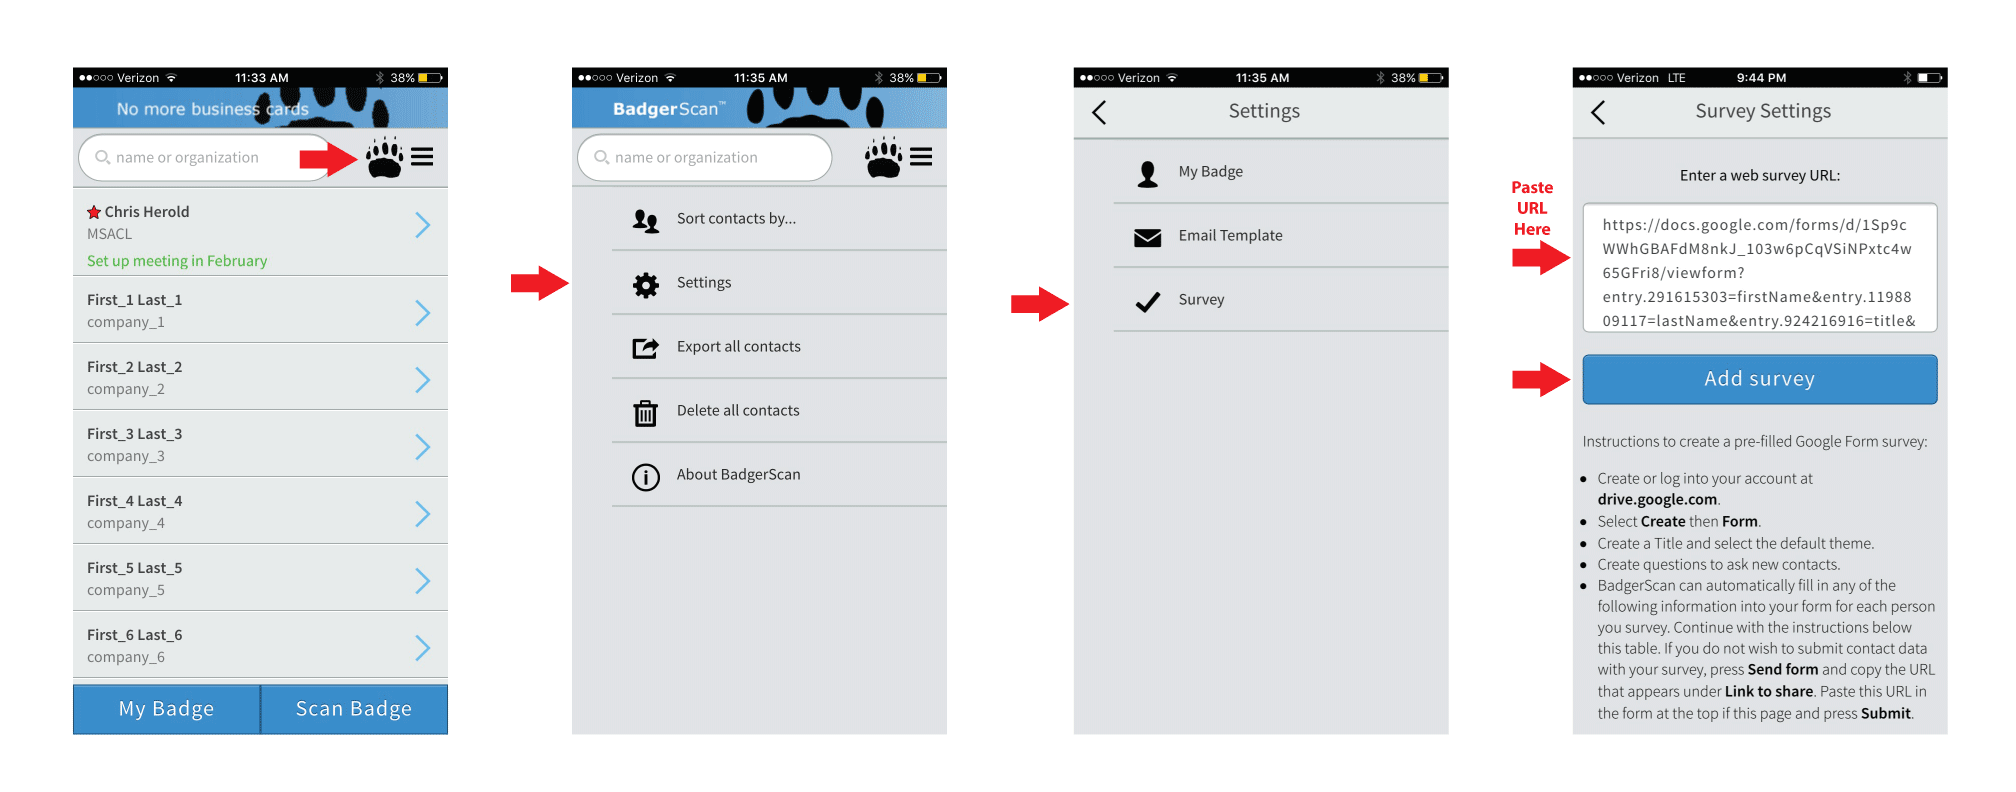
- Open the email on your device and copy the URL to the form in BadgerScan found under Settings -> Survey as shown here.

- Press the Add survey button.
- An option to Launch Survey will now appear on your Contact Details page for each contact you collect using BadgerScan.

